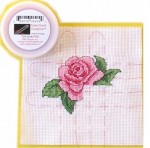
 Guidelines For Gridding:
When stitching a large Cross Stitch project, one of the biggest frustrations is caused by
making mistakes in placing stitches. One part of the design will end up being one space
off. A row missed here will cause another part of the design to be askew.
To help avoid misplaced stitches, many stitchers baste a grid on the fabric that matches
the 10×10 grid used for most Cross Stitch patterns. Easy Count Guideline is a great
product for gridding. This grid can also be drawn on with a water erasable pen. Both Easy Count Guidelines and water erasable pens are available from Cross-Stitch-Art.
Benefits of Using Guidelines
- Know where you are on your fabric and cross stitch pattern at any time.
- Count once and “Go.”
- Count no higher than 10.
- Reduce counting time, increasing stitching progress.
- Concentrate on one or a few colors at any one time.
- Reduce the number and the time of threading multiple needles.
- Make stitching relaxing and fun.
- Cut considerable stitching time (up to a third), allowing completion of more projects.
- Easy removal of plastic Easy Count Guideline means less gridding hassle. There’s no risk of splitting the Guideline with the needle when stitching.
- If vision difficulties have slowed your stitching, the Guideline makes stitching much easier and enjoyable again.
- The biggest benefit of all – It will take less time to complete projects. The product claims that stitching time is reduced by one-third.
Tips for Using Guideline:
- Add an extra 3 inches to your fabric on all sides to make framing easier.
- Test the erasable pen on a small piece of your fabric; then clean it with clear cold water to see if the mark totally erases. Over dyed fabric dyes may be lifted by the pen’s ink.
- If you baste in a grid use a color of plastic thread not in your pattern.
- Sew or mark every 10th line both vertically and horizontally. This will match your pattern grid exactly.
- Now draw lines down and across to form 10 squares by 10 squares on your fabric.
- Do Not complete your pattern by stitching each box one at a time. (It looks really awful—trust me)
A nice short video on youtube will show you every step: http://www.youtube.com/watch?v=33P22qFLKWI

